Setting Up A VPN: How To Protect Your Digital Footprint
Key Takeaways
-
Setting up a VPN involves choosing a reliable provider, installing the VPN software on your device, configuring settings like server location and protocol, and testing the connection for security and speed.
-
Common VPN protocols include OpenVPN, IKEv2/IPSec, and WireGuard, each offering a different balance of speed, security, and compatibility. [1]
-
Many VPN providers offer a no-log policy, meaning they don’t store records of your internet activity, which is vital for privacy.
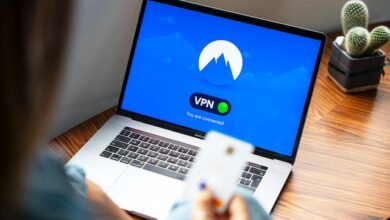
Online privacy concerns are at an all-time high, that’s why setting up a Virtual Private Network (VPN) is a crucial step in protecting your digital footprint. While it may seem like a task for tech-savvy individuals, setting up a VPN is a straightforward process. Explore our step-by-step guide for implementing this vital security measure.
Choosing the Right VPN Provider
VPNs come in various types, each serving different needs while protecting you from different security risks. The most common types of VPNs are remote access, site-to-site, click-to-server, SSL, mobile, and more. Choosing the right VPN provider is a critical decision that can significantly impact your online security and privacy.
-
Security Features: Look for a VPN with robust security features. This includes strong encryption standards (like AES-256), secure protocols (such as OpenVPN, IKEv2/IPSec), and a no-logs policy, ensuring your online activities aren’t recorded. [1]
-
Server Locations: Consider the number of server locations the VPN offers. More servers in diverse locations allow you to access a wider range of content and can provide better speeds.
-
Speed and Reliability: A good VPN should offer fast connection speeds and reliable performance, minimizing internet slowdowns while ensuring your data remains encrypted.
-
Privacy Policy: Carefully read the VPN provider’s privacy policy. Verify that they do not keep logs of your internet activity. Providers headquartered in countries outside of the 14-Eyes surveillance alliance are often preferred for greater privacy.
-
Compatibility: Ensure the VPN is compatible with all your devices and operating systems. Some VPNs offer dedicated apps for various platforms, which can be very convenient.
Fast Facts
“While VPNs are legal in most countries, some regions have restrictions or outright bans on VPN usage, necessitating users to be aware of local laws and regulations.”
Installing VPN Software
Let’s dive into the steps to installing and configuring a VPN, helping you protect your digital footprint with ease.
Setting Up VPN on a PC
-
Choose a reputable VPN service and subscribe to it.
-
Visit the provider’s website and download the VPN software for Windows.
-
Run the downloaded file and follow the on-screen instructions to install the software.
-
After installation, open the VPN application.
-
Enter your subscription credentials (username and password).
-
Access the settings menu to configure any specific preferences (like choosing a protocol, if available).
-
Select a server location from the provided list.
-
Click on the ‘Connect’ button to establish a VPN connection.
Setting Up VPN on a Mac
-
Subscribe to a reliable VPN service.
-
Download the VPN client specifically for macOS from the provider’s website.
-
Open the downloaded file and follow the instructions to install it.
-
Launch the VPN app from the Applications folder.
-
Sign in using your VPN account credentials.
-
Go to the settings to adjust any necessary configurations.
-
Choose your preferred server location.
-
Click ‘Connect’ to start using the VPN service.
Setting Up VPN on an Android Phone
-
Choose and subscribe to a VPN service.
-
Download the VPN app from the Google Play Store.
-
Open the app and enter your account details to log in.
-
Tap on the menu or settings icon to configure options as needed.
-
Select a server location from the available list.
-
Tap on the ‘Connect’ button to initiate the VPN connection.
-
Verify the VPN icon appears in the status bar, indicating an active connection.
Setting Up VPN on Your Router
-
Confirm if your router is VPN-compatible.
-
Select a VPN service and obtain the necessary configuration files.
-
Access your router’s configuration page by typing its IP address into a web browser.
-
Log in with your router’s admin credentials.
-
Navigate to the VPN settings section.
-
Input your VPN subscription details and upload the configuration files.
-
Save the changes and restart your router to enable the VPN connection.
-
Connect your devices to the router to use the VPN network.
Configuring VPN Settings
-
Choose the Right Protocol: VPNs offer various protocols like OpenVPN, L2TP/IPSec, PPTP, IKEv2, etc. OpenVPN is widely recommended for its balance of speed and security.
-
Select a Server Location: Choose a server location based on your needs. If you’re looking to access geo-restricted content, select a server in the relevant country. For general privacy, a server close to your physical location usually offers better speeds.
-
Enable Kill Switch: If your VPN has a kill switch feature, enable it. This feature will block your device from accessing the internet if the VPN connection drops, preventing data leaks.
-
Use Split Tunneling (if available): Split tunneling allows you to choose which traffic goes through the VPN and which uses the regular internet connection. This can be useful for accessing local websites or services while using the VPN for specific tasks.
-
Check Encryption Settings: Ensure your VPN uses strong encryption, ideally AES-256, to secure your data.
-
Configure DNS Settings: Some VPNs allow you to configure DNS settings. Using DNS servers provided by your VPN can enhance privacy and security.
-
Adjust Performance Settings: Some VPNs offer settings to optimize performance, like choosing UDP or TCP for OpenVPN. UDP is usually faster, while TCP is more reliable.
Testing Your VPN Connection
To enjoy the benefits of your VPN, testing your connection is a crucial step. By doing so, you ensure that it is working correctly and providing the security and privacy you need.
First, connect to your VPN and then visit a website like “whatismyipaddress.com” or any similar service that shows your IP address and location. Check if the IP address and location displayed match the server location you chose on your VPN.
Next, perform a DNS leak test. You can do this by visiting a website like “dnsleaktest.com.” This test will show if your DNS requests are being routed through your VPN’s DNS servers. If the test shows your actual location or ISP, your DNS requests are leaking, and you might need to adjust your VPN settings or switch to a different VPN provider.
For a more comprehensive test, you can also conduct a WebRTC leak test, especially if you use browsers like Chrome or Firefox. WebRTC leaks can expose your real IP address even when using a VPN. Websites like “browserleaks.com/webrtc” can help you check for this. If your real IP address is showing, you’ll need to disable WebRTC in your browser settings or use a VPN that offers WebRTC leak protection.
Troubleshooting Common VPN Issues
What can I do if my VPN connection drops frequently?
Ensure your internet connection is stable. Try switching VPN servers, updating the VPN software, or checking for firewall or antivirus interference.
How can I improve slow internet speeds while using a VPN?
Use a server closer to your location, switch VPN protocols, restart your router or modem, and temporarily disable bandwidth-heavy applications.
What should I do if I can’t connect to my VPN?
Check your subscription status and login credentials. Restart your device, ensure your network allows VPNs, and try disabling your firewall temporarily.
Why won’t my VPN connect on Wi-Fi?
Make sure the Wi-Fi network allows VPNs, reset your Wi-Fi settings, or try a different Wi-Fi network to isolate the issue.
How can I fix DNS leak issues with my VPN?
Manually configure your VPN’s DNS settings, use a VPN with DNS leak protection, or flush your DNS cache.
What if a website or service blocks my VPN?
Change your server or IP address, use a stealth mode or a VPN known for overcoming blocks, or try a different protocol.
What should I do if I’m having VPN login issues?
Reset your VPN password, check for VPN service downtime, or clear your browser cache and cookies.
How do I troubleshoot if specific websites won’t load with my VPN?
Clear your browser’s cache and cookies, disable browser extensions, or try accessing the site with the VPN turned off.