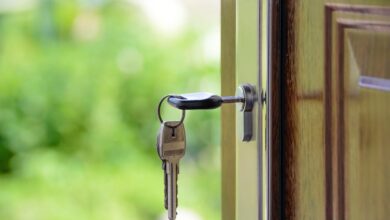
How To Install A Lock On A Door
KEY TAKEAWAYS
Are you looking to enhance the security of your home or office? Installing a lock on your door is an essential step in safeguarding your belongings and ensuring peace of mind. In this comprehensive guide, we will walk you through the process of installing a lock on a door, providing you with detailed instructions and expert tips.
Gathering the Necessary Tools and Materials
Alright, let’s get started by making sure we have all the tools and materials we need to install that lock on your door. Installing a lock may seem intimidating, but with the right tools and materials, it can be a straightforward process. Here’s what you’ll need:
Lockset: Choose a lockset that suits your needs. Consider factors like security level and aesthetics when selecting one.
Screwdriver: A good quality screwdriver is essential for installing a lock. Make sure it fits the screws provided with your lockset.
Measuring tape: Accurate measurements are crucial to ensure proper alignment of the lock components. Use a measuring tape to measure the door thickness and backset distance.
Drill: If your door doesn’t have holes for the lockset, you’ll need a drill to create them. Ensure you use an appropriate drill bit size specified by the manufacturer.
Chisel: To create space for the strike plate, you’ll need a chisel. This tool helps cut out recesses on both sides of the door frame.
Pencil: Marking key points and outlines is important during installation, so keep a pencil handy.
Door wedge or shim: This will help stabilize the door during installation, preventing accidental movement or damage.
Screws and fasteners: Check if your chosen lockset includes screws and fasteners for installation; otherwise, purchase them separately based on your specific requirements.
By gathering these necessary tools and materials before starting, you’ll be well-prepared to tackle each step of installing a new lock on your door confidently!
Removing the Existing Hardware
To start, you’ll need to remove the old hardware from the door. Removing the existing hardware is an important step in installing a new lock on a door. It ensures that the new lock will fit properly and function smoothly. Before you begin, gather your tools: a screwdriver, pliers, and possibly a hammer or mallet.
Step 1: Locate the screws that hold the doorknob in place. These are typically found on the inner side of the door. Use your screwdriver to remove these screws by turning them counterclockwise. Once all screws are removed, carefully pull apart both sides of the doorknob to expose the latch mechanism.
Step 2: Next, look for screws or bolts holding the strike plate onto the door jamb. Remove these screws using your screwdriver or pliers as necessary. Once all screws are removed, gently pry off the strike plate with your screwdriver or fingers.
Step 3: After removing both sides of the doorknob and strike plate, you may need to detach any additional hardware, such as deadbolts or chain locks. Consult your specific lock’s instructions for guidance on removing these components.
Step 4: Inspect the door for any remaining hardware or debris that needs to be cleared away before installing your new lock. Use pliers if needed to remove any stubborn nails or staples.
Taking off old hardware from a door requires attention to detail and patience. By following these steps and using the proper tools, you can successfully remove existing hardware and prepare for installing a new lock securely and efficiently.
Preparing the Door for Installation
Step 5: Once the existing hardware has been removed, it is important to properly prepare the door for the upcoming installation. This step is crucial in ensuring that the new lock will fit securely and function smoothly. Start by inspecting the door’s surface for any damage or imperfections. If there are any dents, scratches, or uneven areas, they should be repaired or filled in with wood putty to create a smooth and even surface.
Step 6: Next, measure and mark the placement of the new lock on both sides of the door. Use a tape measure to determine the appropriate height for installation based on standard measurements or personal preference. Mark these measurements with a pencil to be easily referenced during installation.
Step 7: To create holes for the lock mechanism and latch plate, use an appropriate drill bit size specified in the lock’s instructions. It is essential to drill straight and level holes to ensure proper alignment of all components. To avoid splintering or chipping the wood, start drilling slowly and steadily.
Step 8: After drilling these holes, test-fit each lock component to ensure they align correctly. Adjustments may be necessary if anything does not fit properly. Once you are satisfied with their placement, secure them using screws provided with your lock set.
Step 9: Lastly, double-check all components are functioning smoothly before installing your new lock. By properly preparing your door for installation, you will help guarantee a successful outcome and improve security for your home or office space.
Installing the Lock Mechanism
Now it’s time to get down to business and put that shiny new lock in place! Installing the lock mechanism may seem daunting, but with the right tools and patience, you’ll have it secured quickly.
1. First, gather all the necessary materials: your new lockset, screwdriver, tape measure, chisel, hammer, and pencil. Begin by removing the existing doorknob or lock from both sides of the door. Keep these screws handy, as they may be needed later.
2. Next, take out the latch plate that comes with your new lockset. Place it on the edge of the door where you want your lock to be positioned. Use a pencil to trace around the plate so you know where to chisel. Now grab your chisel and carefully create a recess for the latch plate. Be precise with your cuts to ensure a snug fit.
3. Once the recess is complete, align the latch bolt with its corresponding hole on the edge of the door. Slide it into place until it’s flush with both sides of the door. Secure it using the screws provided in your lockset package.
4. Now comes attaching the exterior part of your lockset – typically called an escutcheon – onto one side of your door. Line up holes on both sides and insert screws into their designated places. Tighten them just enough so that everything stays in position but isn’t fully tightened yet.
5. Attach the interior portion of your lockset – usually referred to as a rose – onto its respective side of the door by repeating step 5 above.
Congratulations! You’ve successfully installed your new lock mechanism! Test it out by turning the knob or lever from inside and outside to make sure everything works smoothly before tightening all screws completely.
Remember that this guide is general advice; each brand might have specific instructions in their packaging, which should take precedence over these suggestions if any discrepancies arise during installation. Happy securing!
Testing and Adjusting the Lock
You’re almost there! It’s time to put your skills to the test and make sure that shiny new lock is working flawlessly. Testing and adjusting the lock is a crucial step in the installation process, as it ensures that the lock functions smoothly and provides optimal security for your door.
1. To begin, close the door and insert your key into the lock. Turn it clockwise to engage the locking mechanism. Try turning the key back counterclockwise to unlock the door. Pay attention to any resistance or difficulty in operating the lock. Ideally, it should rotate smoothly without any sticking or jamming.
2. Next, try locking and unlocking the door inside and outside using different keys, if applicable. This will help you determine if there are any issues with key alignment or compatibility. Ensure that each key operates effortlessly within its respective cylinder.
3. Additionally, check if the latch bolt retracts smoothly when you turn the knob or lever on both sides of the door. The latch should extend fully into its strike plate when closed and retract completely when opened.
4. If you encounter any problems during testing, adjustments may be necessary. For instance, if there is resistance when turning the key or operating the knob/lever, lubricate all moving parts with graphite powder or silicone spray.
5. Furthermore, if you notice misalignment between components, such as strike plates or latch bolts not engaging properly, make appropriate adjustments by loosening screws slightly and repositioning them until everything aligns correctly.
Remember that a well-adjusted lock is essential for proper functioning and security. Take your time during this step to ensure everything is in perfect working order before considering your installation complete.
Frequently Asked Questions
How often should I change the locks on my doors?
You should change the locks on your doors when certain circumstances arise. For instance, if you lose your keys or are stolen, it is crucial to replace the locks immediately to maintain security. Additionally, if you move into a new home or apartment, changing the locks is recommended as a precautionary measure. Regularly inspecting and maintaining the condition of your locks can also help determine if they need to be replaced.
Can I install a lock on a door made of glass or metal?
Yes, you can install a lock on a door made of glass or metal. For a glass door, consider using a double-sided deadbolt lock specifically designed for glass doors. Ensure the lock is compatible with the thickness of your glass and follow the manufacturer’s instructions for installation. As for metal doors, you can use various types of locks, such as mortise locks or cylindrical locks. It is essential to select a lock that matches the door’s thickness and consult professional advice to ensure proper installation.
What should I do if the existing holes on my door are not aligned with the new lock?
If the existing holes on your door are not aligned with the new lock, don’t worry. You can still install the lock by following these steps. First, measure and mark the correct placement of the lock on the door. Then, using a drill, carefully create new holes that align with the lock’s requirements. Ensure that the holes are deep enough to securely hold the lock in place. Finally, attach and secure the lock according to the manufacturer’s instructions.
Are there any specific safety precautions I should take during the installation process?
When installing a lock on a door, it is crucial to prioritize safety. Before beginning the installation process, ensure you have all the necessary tools and equipment. Wear protective gloves to prevent any injuries while handling sharp objects or tools. Take precautions to avoid damaging the door or surrounding areas during drilling or screwing. Additionally, double-check that the lock mechanism is securely installed to ensure optimal security for your door.
How do I choose the right type of lock for my specific door?
To choose the right type of lock for your specific door, consider the level of security you need. For exterior doors, a deadbolt lock is recommended as it provides greater resistance against forced entry. Look for locks with a high-security rating and features like anti-pick pins or bump-proof technology. Additionally, match the lock’s size and style to your door’s design for aesthetic appeal. Consult a locksmith if you have any doubts or need personalized recommendations.
Installing a lock on a door is a straightforward process that can be accomplished with the right tools and materials. Following the steps outlined in this article, you can successfully remove the existing hardware, prepare the door for installation, and install the lock mechanism. Remember to test and adjust the lock to ensure proper functionality. With careful attention to detail and patience, you’ll have a secure door in no time.
![Photo of Best Smart Door Lock With Camera For Your Home [2023]](https://www.securityforward.com/wp-content/uploads/2023/02/smart-door-lock-with-camera-390x220.jpg)