Smart Lock Repair: DIY Tips And Tricks
KEY TAKEAWAYS
Welcome to our blog! In today’s post, we will delve into the world of Smart Locks – the cutting-edge technology that has revolutionized home and office security. However, like any technological device, these locks may malfunction or break down over time. But, before you decide to call a professional and spend a fortune, why not try to fix it yourself?
In this guide, we’ll provide easy-to-follow steps and valuable insights to help you troubleshoot and repair your smart lock. So, let’s dive in and become your own locksmith!
Overview Of Smart Locks
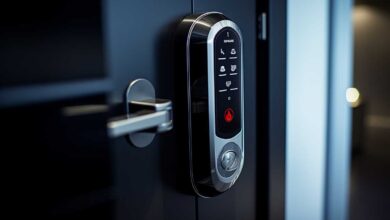
The evolution of home security has brought us to the era of smart locks. These advanced locking mechanisms offer homeowners a blend of convenience, security, and technological prowess. According to a market research report by Technavio, the global smart lock market is expected to grow by USD 2.28 billion during 2020-2024, indicating an increasing acceptance and usage of this technology. Unlike traditional locks, smart locks provide keyless entry, remote access, and even integration with other smart home devices. But like all technology, they can sometimes face issues. Fortunately, many of these issues can be addressed through DIY repairs.
Benefits Of DIY Repairing Smart Locks
Opting for DIY repairs of smart locks offers several advantages:
-
Cost-Effective: Save on professional repair fees.
-
Quick Solutions: Address issues immediately without waiting for a technician.
-
Knowledge Gain: Understand the intricacies of your security system.
-
Personalized Adjustments: Customize settings and features according to personal preferences.
Getting Started
Before diving into the repair process, it’s essential to be well-prepared. This ensures not only the effectiveness of the repair but also the safety of the individual.
Necessary Tools And Supplies
To repair a smart lock, you’ll need:
-
Screwdrivers: Both flat-head and Phillips.
-
Tweezers: For handling small components.
-
Multimeter: To check for electrical issues.
-
Replacement Parts: Depending on the issue, you might need new batteries, circuit boards, or mechanical components.
-
Lubricant: For smoothening out any friction in the mechanism.
Safety Considerations
Safety should always be a priority:
-
Turn Off Power: Ensure the lock is disconnected from any power source.
-
Use Insulated Tools: This prevents any accidental electrical contact.
-
Work In A Well-Lit Area: Proper visibility is crucial to avoid mistakes.
Understanding The Lock Mechanism
Smart locks may seem complex, but their basic mechanism is similar to traditional locks. They consist of:
-
Motor: Drives the locking mechanism.
-
Sensors: Detects authorized access.
-
Control Board: The brain of the lock processes commands and controls other components.
Understanding these parts will help in diagnosing and fixing issues.
Locating The Existing Strike Plate Position
The strike plate is where the bolt enters the door frame. Its position is crucial for the lock to function correctly. If misaligned, the lock might not work. To locate and adjust:
-
Inspect The Door: Look for signs of wear or marks that indicate the bolt’s path.
-
Adjust If Necessary: Loosen the screws, realign the plate, and tighten.
By ensuring the strike plate is correctly positioned, you can solve many common locking issues.
Preparing For Installation
Before installing or repairing a smart lock, proper preparation is paramount. This ensures a smooth process and a secure fit for the lock.
Drilling Holes For New Screws And Strike Plates
When installing a new smart lock or replacing parts, you may need to drill new holes:
-
Choose The Right Drill Bit: Ensure it matches the size of the screws or bolts.
-
Mark The Spot: Use a pencil or marker to pinpoint where you’ll drill.
-
Steady Your Hand: Hold the drill perpendicular to the door or frame.
-
Start Slowly: Begin drilling at a slow speed to ensure accuracy, then increase speed as you go deeper.
Measuring And Marking Deadbolt Lock Position On Door Jamb
The deadbolt’s position is crucial for the lock’s functionality:
-
Close The Door: Ensure it’s in its natural closed position.
-
Mark The Top And Bottom: Use a pencil to mark where the deadbolt touches the door jamb.
-
Measure The Distance: Use a ruler or tape measure to find the center between the two marks. This is where the deadbolt will enter the jamb.
Installing A Piece Of Wood For Support (If Necessary)
In some cases, especially with older doors, you might need additional support:
-
Choose A Strong Wood: Hardwood like oak is ideal.
-
Cut To Size: Measure the area where the lock will be installed and cut the wood accordingly.
-
Secure The Wood: Use strong adhesive or screws to attach the wood to the inside of the door where the lock will be placed. This provides added strength and stability.
Installing The Smart Lock Cylinder And Deadbolt Lock Hardware
The heart of any smart lock is its cylinder and deadbolt hardware. Proper installation ensures optimal performance and security.
Positioning The Smart Lock Cylinder In Place
The cylinder is the component where you insert a key or where the electronic mechanism resides:
-
Align The Tailpiece: The tailpiece of the cylinder should fit into the slot of the deadbolt.
-
Insert The Cylinder: Gently push the cylinder into the door hole, ensuring it’s flush with the door’s surface.
-
Secure With Screws: Use the provided screws to fasten the cylinder in place, but avoid over-tightening, which can strain the mechanism.
Assembling the Deadbolt Lock Hardware Together
The deadbolt provides the actual locking mechanism:
-
Slide The Deadbolt: Insert the deadbolt into the edge hole of the door, ensuring the top is facing upward.
-
Align With The Cylinder: The deadbolt should align with the tailpiece of the cylinder.
-
Attach The Mounting Plate: This plate holds the deadbolt in place. Secure it using the provided screws.
-
Connect Electronic Components: If your smart lock has electronic features, connect them as per the manufacturer’s instructions.
Testing Out The Lock System
After the meticulous process of installing or repairing a smart lock, it’s imperative to ensure that the system functions seamlessly. Testing the lock system is not just about ensuring that the door locks and unlocks. It’s about guaranteeing that all integrated features work harmoniously, providing the security and convenience smart locks promise.
-
Manual Testing: Begin by manually locking and unlocking the door using a key or the lock’s touch interface. The action should be smooth, without any resistance or grinding noises.
-
Electronic Functionality: If your smart lock is equipped with remote access, use the corresponding app or remote control to lock and unlock. Ensure that the response is immediate and that there’s no lag between the command and the action.
-
Integration With Other Devices: Many smart locks can be integrated with home automation systems. Test the lock’s compatibility and functionality with other devices. For instance, if connected to a home security system, ensure the system recognizes when the door is locked or unlocked.
-
Battery And Power: Check the lock’s battery level or its connection to the power source. If the lock operates on batteries, see how it alerts you when the batteries are low. For wired systems, ensure there are no disruptions due to loose connections.
-
Alarm And Notifications: If your smart lock has a built-in alarm or sends notifications for unauthorized access attempts, simulate a break-in or input incorrect codes multiple times. The system should alert you immediately.
-
Guest Access: If your lock allows for guest access codes or temporary access, set up a temporary code and test its functionality. Afterward, ensure you can easily revoke this access.
-
Auto-Lock Feature: Some smart locks automatically lock after a set period. If yours has this feature, time it to ensure it locks within the designated timeframe.
-
History And Logs: Access the lock’s history or logs if available. This feature keeps track of when the door was locked or unlocked and by whom. Ensure it’s accurately recording these details.
-
Physical Inspection: Lastly, inspect the lock physically. Ensure that there’s no wobbling, that all screws are tight, and that the lock sits flush with the door.
Frequently Asked Questions
We have addressed some of the most commonly asked queries to provide you with a better understanding of smart lock repairs.
How often should I test my smart lock system?
It’s recommended to test your smart lock system immediately after installation or repair to ensure optimal functionality. Subsequently, a monthly check is advisable. Regular testing helps in early detection of potential issues, ensuring that the system’s security features remain robust and reliable over time.
What should I do if my smart lock isn’t responding to the app commands?
If your smart lock isn’t responding, start by ensuring your app is updated to the latest version. Connectivity issues can sometimes be resolved by restarting the app or your smartphone. Check the lock’s battery level or its connection to the power source. If these steps don’t resolve the issue, consult the user manual or reach out to the manufacturer’s customer support.
Can smart locks be hacked?
While smart locks use advanced encryption and security protocols, making them difficult to hack, no system is entirely immune. It’s essential to regularly update the lock’s software and maintain strong, unique passwords. Additionally, using two-factor authentication and monitoring access logs can further enhance security.
How long do the batteries in a smart lock typically last?
The battery life of a smart lock varies based on the model and usage frequency. However, most smart locks can last anywhere from 6 months to a year on a single set of batteries. It’s beneficial to use high-quality batteries and monitor the lock’s battery indicator to ensure uninterrupted operation.
Can I integrate my smart lock with voice assistants like Alexa or Google Assistant?
Many of today’s smart locks are designed to be compatible with popular voice assistants like Alexa or Google Assistant. To integrate, ensure your lock model supports this feature. Typically, you’d connect via the respective voice assistant’s app, allowing for convenient voice-activated commands.
What happens to my smart lock if there’s a power outage?
Most smart locks are battery-operated, ensuring they remain functional even during power outages. For those that are wired to a home’s power system, it’s crucial to have a manual key access or a backup battery system in place. This ensures you’re never locked out, even if the power is down.
Repairing Your Smart Locks
Smart locks represent the fusion of traditional security with modern technology, offering homeowners unparalleled safety and convenience. As with all tech-driven solutions, ensuring their optimal functionality is paramount. Regular testing and maintenance not only guarantee the longevity of the device but also the unwavering security of your home. While they are robust and reliable, occasional issues can arise. With the right knowledge and tools, many of these problems can be addressed through DIY repairs. Not only does this save money, but it also empowers homeowners to take control of their security. Remember, the key to a successful repair lies in understanding the mechanism, having the right tools, and prioritizing safety.
Discover more about how to keep your house and family safe by reading our in-depth reviews on the best smart home security systems. For additional information, visit Security Forward and explore our resources and guides.

